All calls are outstanding by default. Calls can be marked as dealt with in the Call Manager. This status can then be used to filter reports on.
Call Status
Dealt with calls only
Where dealt_with column in tbl_session is = 1
Outstanding calls only
Where dealt_with column in tbl_session is = 0
Both
Where dealt_with column in tbl_session is ignored and omitted from query
Inbound scripts in particular may include a chargeable control, which can be used to filter reports on. This control is also used with the optional Billing and Invoicing module.
Call Type
Chargeable Calls Only
Where Chargeable column in tbl_session = YES
Non Chargeable Calls
Where Chargeable column in tbl_session = NO
Both
Where Chargeable column in tbl_session is ignored and omitted from query
Choosing to "Mark Calls as Dealt With" will only do so when the report is scheduled to run automatically using the Report Scheduler, rather than manually run using the Report Runner. This will mean that they are not picked up on the next scheduled run. It will effectively update tbl_session for the record included on the report and set the dealt_with column value to '1'
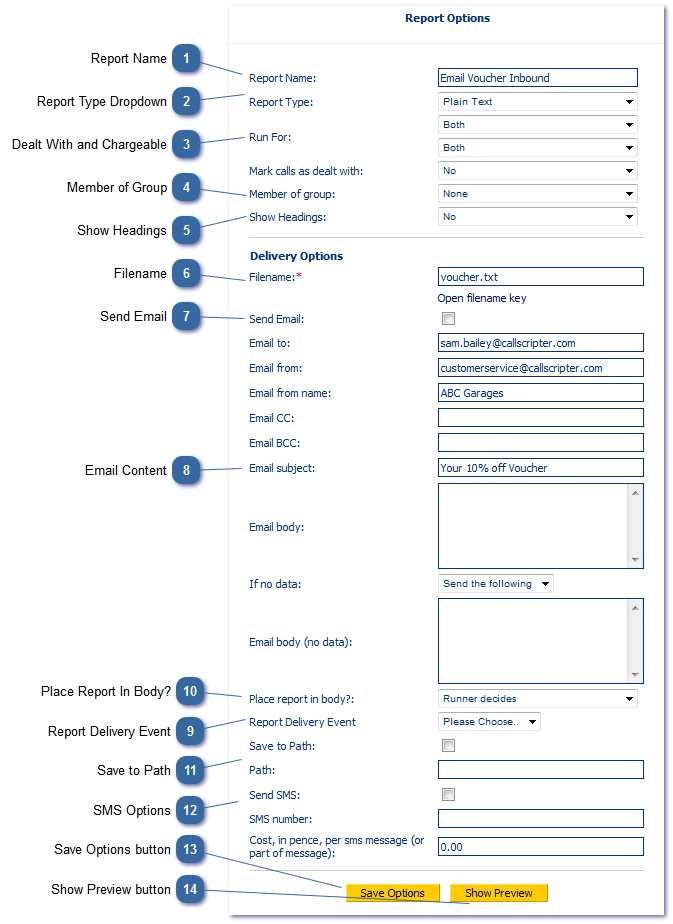
Choose whether or not to show your headings. If for example you are creating an Excel report, you will probably want to show the headings or field names corresponding to your data. If you are creating a report to generate an email or letter, or to insert data into an Excel Template which already contains headings, you will not want the headings to show.
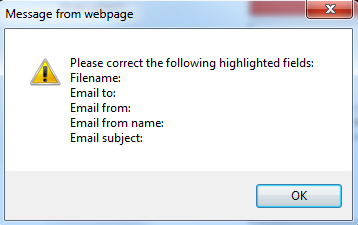
If sending a file via email, manually downloading it, or saving it to a path, you must enter a file name. Note that file extensions must be added which correspond with the type of report you selected at (2)
Excel File: .xls
Rich Text File .rtf
Plain Text File .txt
Comma Delimited File: .csv
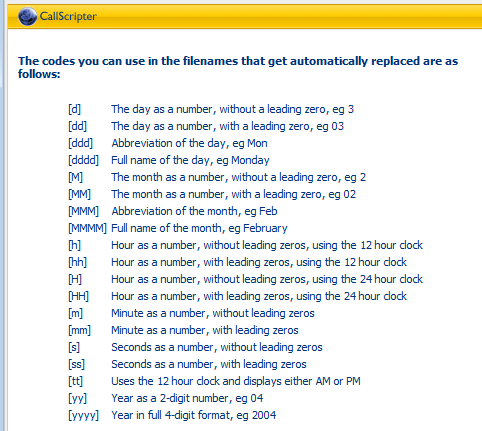
You can append a date and time specific code to the end of your file name to differentiate it from other reports delivered to the recipient or location. For example, report[dd][MM][yyyy].txt will generate a file called report21062013.txt
Click on the "Open filename key" link to view available options:
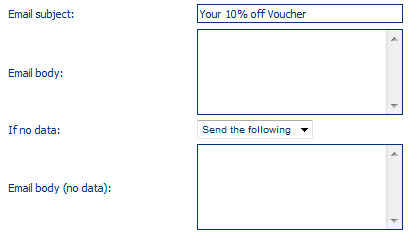
Enter a subject and body for the email to which the report will be attached. If the report contains no data you can specify a separate message. There is no need to complete this section if you are sending your email from within a script.
The report runner can decide when to include the results of your report in the body of an email or document, or as an attachment depending on how the report is run. If using one of the Report Runner Controls in script, to run the report, the runner would decide to include the report results in the body of the email., or as an attachment If running the report manually from the Report Runner, the runner would prompt the person running the report to download the file associated with the report.
To save the report to a path, check the box and enter the full path. You must ensure that the scheduler service running on the CallScripter server has the appropriate permissions to access the destination path.
Send the results of the report to a specified SMS number and associate a cost with the SMS for billing purposes if required. SMS can be sent to multiple numbers if your provider supports it. CallScripter can store a maximum of 300 characters in this field.