1. Logging In
CallScripter is a web application and is accessed using Internet Explorer from any PC on your network. Open up Internet Explorer and type the URL provided by your IT department in the address bar and then hit Enter. You will then be prompted for a username and password. Please enter the username and password provided by your IT department.
2. Open the Script Editor
Click on the Script Editor icon:
Select the Edit Scripts icon:
2. Create a customer
Once the Edit Script icon is clicked the Customer screen will appear - customers act as folders to keep the scripts organised. Each customer can contain multiple scripts. To create a customer, click on the Add button and enter the Customer (folder) name. Click on the Add button to save the new customer. Contact details can be added if required. Double click on the customer name to move to the next screen.
3. Create a script
The Script Properties page will appear. Click the 'Add' button in the bottom left corner of the screen to create a new script name. Enter your new script name in the pop up provided. The script attributes and properties will appear on the right side of the screen, further information can be found in the Script Attributes section. Double click on the script name to move to the Script Versions screen.
4. Select a script to edit
Double click on the version of the script you wish to edit. The script will open.
5. Adding Pages
When a script is created the default view will vary depending on the CallScripter set up. Either:
-
There will be default pages which will display in the top left corner (these pages have been created as
templates and set to appear in every new script created)
-
No pages will display and will need to be added. These notes will detail how to create each page in turn.
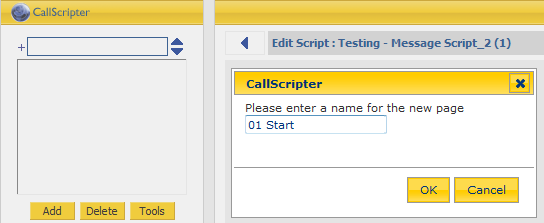
To create a new page click on the Add button underneath the page list, and enter a name for the new page. Click on the OK button. Repeat as necessary to add further pages.
Note: Using numbers helps script builders to view the order the pages will run (note that Button controls actually determine how pages are linked - this list is purely visual).
In this example 4 pages have been added:
6. Page Properties
Scripts need to have a Start, Wrap and End page.
-
The start page will display when the script is activated
-
The Wrap page is moved to when an agent clicks on the End Call button when running a script
-
The End page closes the script and is not viewed by agents
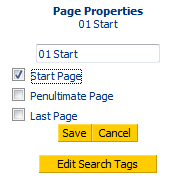
Click on the Tools - Page Properties button. Tick the appropriate page type and click on the save button. Repeat as necessary, ensuring Start, Penultimate and End pages have been set. In this example the page properties are:
01 Start: marked as Start Page
02 Message: no page properties
98 Wrap Page: marked as Penultimate Page
99 End Page: marked as Last Page
7. Adding Controls
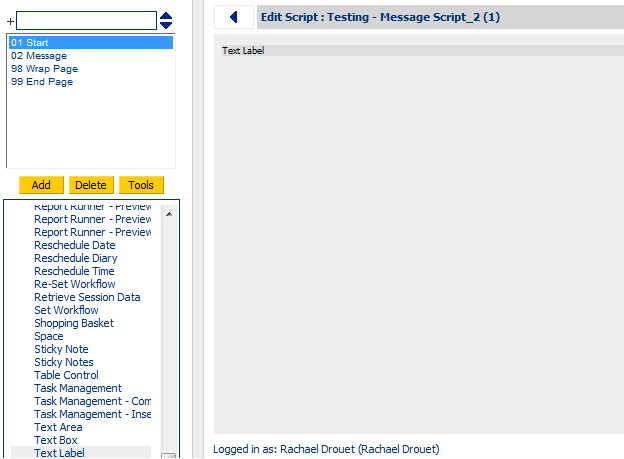
System Controls are added to pages by single clicking on the appropriate control name. Select the page to add the control to, and then find the control in the System Controls list (displayed underneat the Page List box).
The control will appear on the script page (in this example a Text Label has been added).
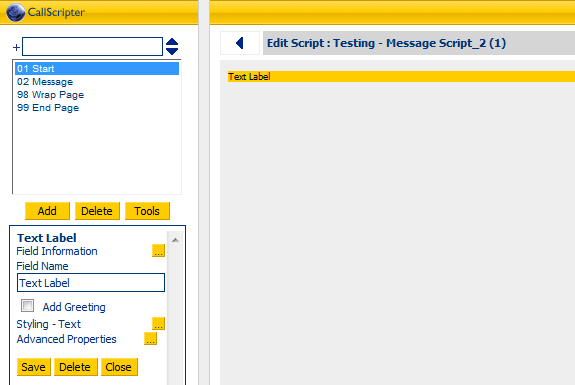
The controls can be configured by single clicking on the Control Bar. The System Control list will display the control properties:
You can learn more about working with individual controls by viewing the Controls section in this user guide. The most common controls are Text Labels (to display information to an agent, to tell them what to do) and Text Boxes (to allow agents to enter information for data collection purposes). There are many other controls which serve a variety of purposes, from displaying images, opening web pages, importing data to name a few. Most controls are configured using the Advanced Properties button.
As well as using controls which display or collect information, each page will need a method of moving onto another page or closing a script. Button controls are most commonly used to do this.
8. Checking the Script
Once the pages have been built and linked users can opt to check the script, ensuring all pages are linked correctly and page properties have been assigned.
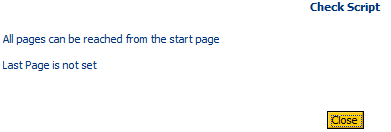
Click on the Tools button, and select Check Script. Any issues will be highlighted (in this example, the Last Page has not been set):
Once all issues (if any) are resolved the script can be run in the Script Editor to test it. This allows the script builder to view the page as an agent would, and to ensure the controls appear and work as expected.
9) Run the Script (Test Mode)
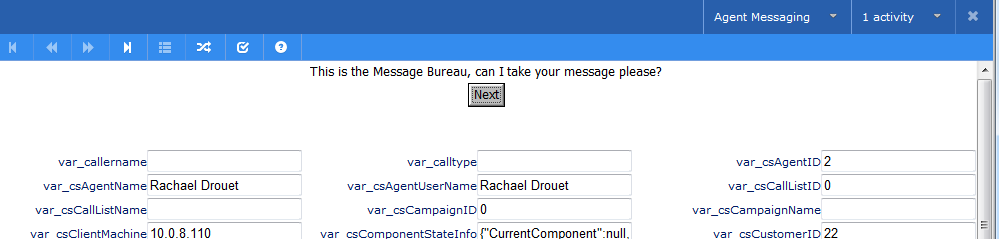
Click on the Tools button and select Run Script. The script will open in a new Window. The Agent Navigation toolbar will appear in the top left corner. The script can be worked through as required, using the buttons to move from each page. The System Variables appear underneath the script controls, these will not appear when the script is live and run by agents in the Agent Desktop.
Ensure any test runs are marked as Training/Test calls (using an Outcome control) to ensure all test data is excluded from reports. Even when testing a script do not use the Close (X) button in the top right corner of the Window as this will create an Incomplete Script run. If testing has been finished users can click on the End Call button (Agent Navigation Toolbar) to move to the penultimate page.
10) Making the Script Live
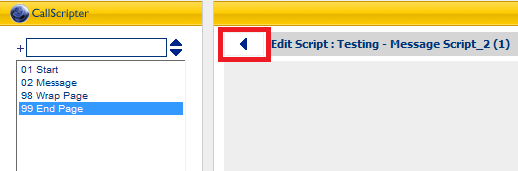
Before the script can be used in the contact centre it needs to be set 'Live'. Return to the Script Attributes page by clicking the Back button (top left corner):
Single click on the script name you wish to set live. The options for the script will appear on the right side of the screen.
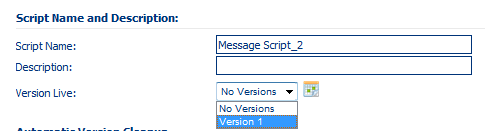
A version live drop down box will show in the options on the right side of the screen. Select the version of the script you wish to be live in the contact centre and click on the save changes button at the bottom of the screen.
11) Viewing the Script in the Agent Desktop
Click on the globe icon in the top left corner to return to the CallScripter splash screen.
Click on the Agent Desktop icon from the main menu. Select either the Inbound icon (version pre4.5.26) or the Agent Desktop icon (versions 4.5.26+). A list of live inbound scripts will appear, including the name of your script if you successfully set it live. Double click on the script to open it.
To exit the script, use the toolbar at the top of the script.
12) Further Help
This guide is intended only as a very basic getting started exercise and only includes a very small part of the applications functionality. To exploit the full potential of the application please speak to the Professional Services team to find out more about our range of quality training courses, available in either classroom or webinar format.