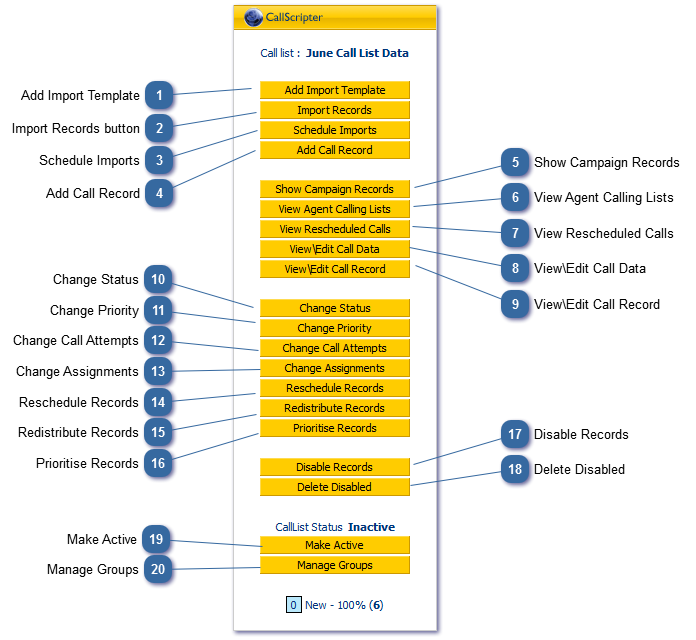
Once you have created your campaign and call list, you will be taken to this screen.
Add Import Template
Each Campaign may have many call lists and many templates. Before you can import records into your call list, you must add create an import template which maps your call list data to your script fields. Click the Add Import Template button and follow the wizard. Step by step instructions are available here: Setup Outbound Template Wizard.
Specify the call list into which you will import the data.
Specify the template to use to import the records.
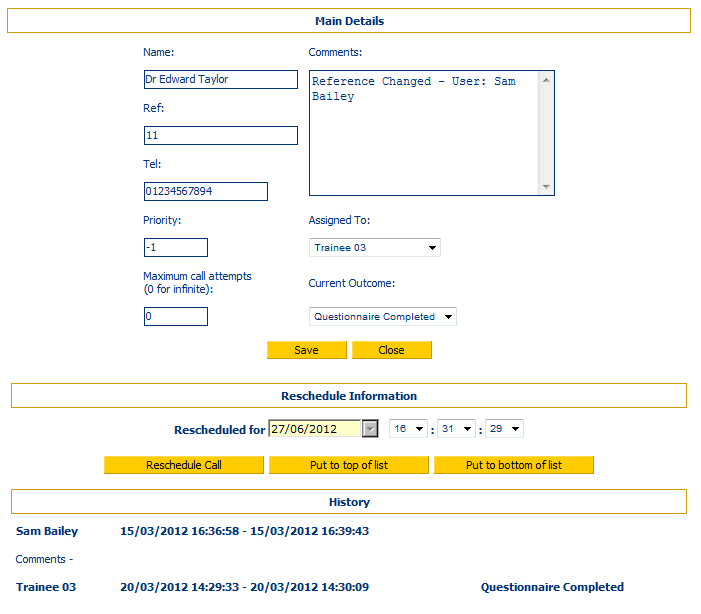
Set Maximum call attempts. The call will be marked as completed after a specified number of attempts.
Specify the priority of these calls. 100 is high priority, 0 is low priority. There are no rules for numbers in between except that they will be delivered to the agent in order of priority. These only exist to help you prioritise batches of records. Priorities can also be set in the Campaign Records View.
Assign calls to Users - Assign to one agent, or all agents. Calls can be reassigned to other agents later if required.
Ignore or Update Duplicate Rows. Use this tool to update your call list rather than import it.
Manually add a single record by typing the information into the fields. Adding a record in this way does NOT allow you to enter data for any script fields, only the campaign fields.
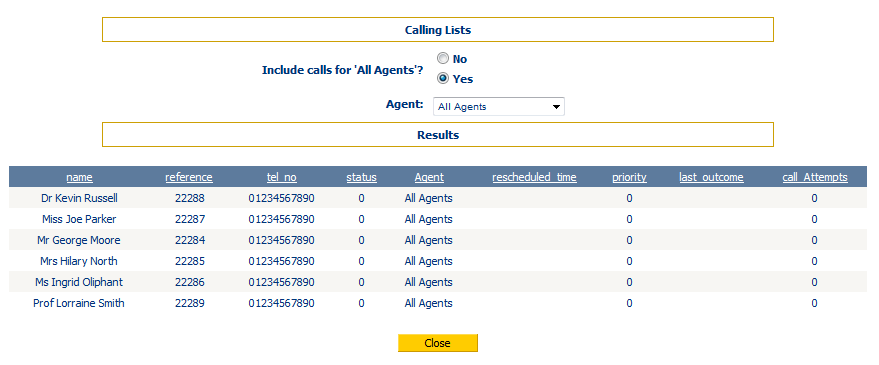
Show the records associated with the currently selected call list. This is the default view that is shown when you double click on an existing call list. Use this view to mass update call list items.
Double clicking on a select checkbox will jump to the Call Record Details for that call.
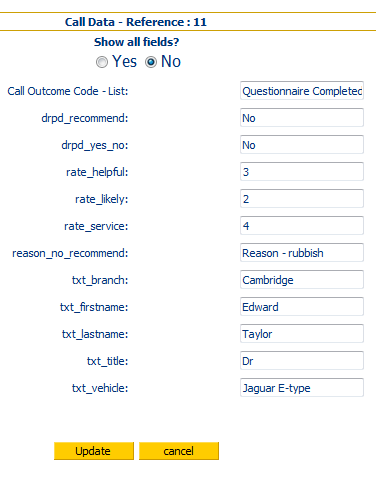
This allows you to view and edit the data collected on a particular call. To change the outcome of or reschedule a particular call, see View\Edit Call Record, below The agent may have made a mistake which needs rectifying. This is where you would do it.
Make sure you are viewing campaign records for the correct call list, then select a COMPLETED record to view by checking the box in the left hand column of the list that corresponds to the record you wish to view or edit.
By default, only the fields where the data was collected are shown. Choose the "Yes" radio button to Show All Fields.
Edit the collected data and click Update or Cancel at the bottom.
Change the maximum Call Attempts (the number of re-tries the system will make until the calls are Finished, 0 = infinite) of single or multiple records using the following search options:
Change the who the records are assigned to (reassign calls from one agent to another) of single or multiple records using the following search options:
Select the user groups that will be able to make calls from the current call list. This is particularly relevant where the call in a call list are assigned to All Agents/All Users.