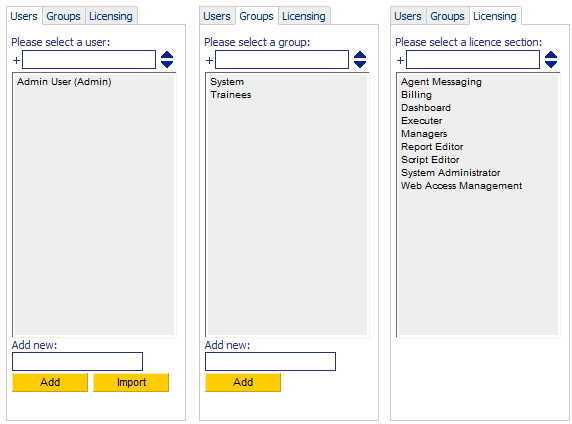
The User Manager is used to create, edit and disable users and groups. When the User Manager module is opened three tabs display in the top left of the screen:
Users
To create a user, enter the username you wish to create in the Add New field at the foot of the list of existing users and click Add.
The user details will appear in the right hand pane of the screen, where the username, firstname, surname, default language and password display and can be changed for that user. If you do not enter a password, the user will be able to log on with no password. You can add the user to existing Groups and they will inherit the permissions associated with that group.
Users can be imported from the Active Directory using the Import button at the foot of the users tab. Note that the functionality is limited to showing all domain users, you can tick those you wish to import to CallScripter.
Deactivated/disabling Users
Users cannot be deleted, only disabled. To disable a user select the user from the user list, then uncheck the "Enabled" box.
Groups
Groups can be used to either limit the scripts displayed in the Agent Desktop, or which scripts can be viewed/changed in the Script Editor module by script builders.
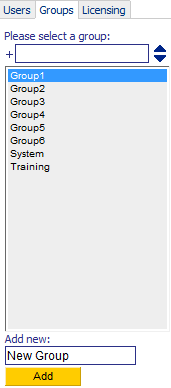
Groups are added and managed using the Groups tab. To add a group, enter the new group name in the "Add New" dialog box, and then click on the Add button:
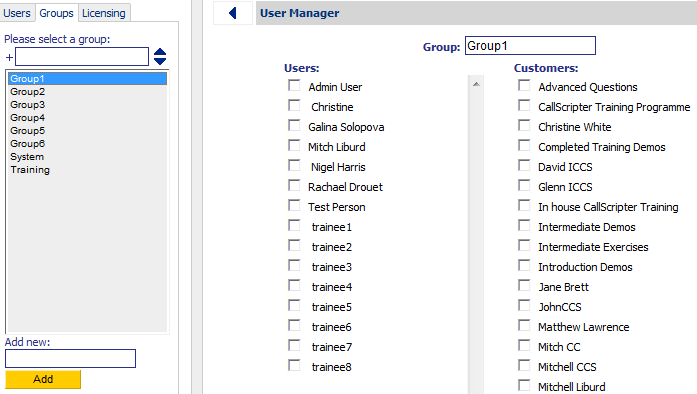
Users can be added to a group by either 1) clicking on the Group tab, selecting the Group name and ticking the appropriate User Account name to add it to the group:
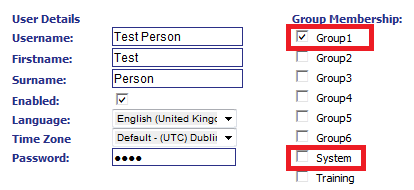
Or 2) by going to the User tab, selecting the user account, and then placing a tick against the appropriate Group name. Please note: group permissions only take affect when the System tick is removed. See examples below:
Using Groups for Agents (example)
To limit the scripts that can be accessed in the Agent Desktop:
-
Create a user account in the User tab (if account does not already exist)
-
Create a group in the Group tab (if group does not already exist)
-
Go to the User tab. Select the account name. Remove the System tick (this gives the user access to all customers by default).
-
Tick the Group name to add the user.
-
Go the the Script Editor module, and double click on the Customer name to view the script list.
-
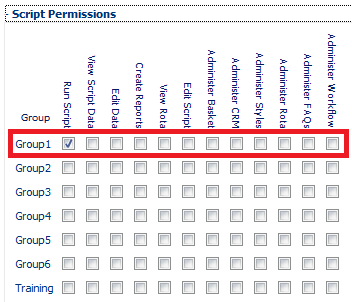
Click on the script name to view the script properties. Open up the Script Permissions options:
-
Tick the Run Script option to add this script to the group. This will allow agents to view and run the script in the Agent Desktop. Ensure you test the user account to ensure it produces the expected result.
*Please note: if users associate a group with a customer that already has scripts, the permissions do not apply to the scripts that existed before the group did. However, if a group is created and then customers are associated with it, the permissions will apply.
Using Groups for Script Builders (example)
Follow steps 1- 4 as above.
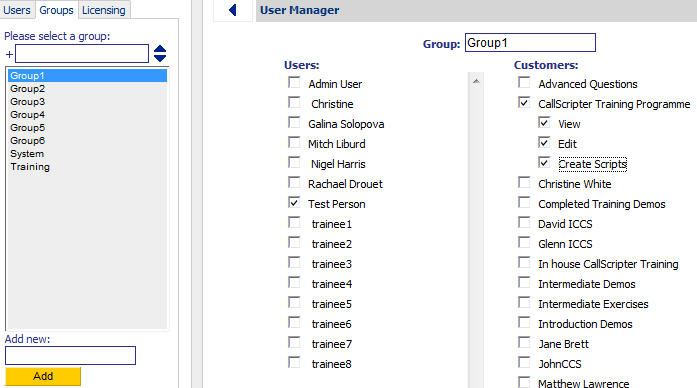
5. Go to the Group tab. Select the Group name.
6. Tick the user name (displayed in the first list - Users) to add the user account to the group.
7. Tick the box next to the Customer name (displayed in the 2nd list - Customers) to display the View, Edit and Create Scripts options (this tick option is for displaying the view, edit, etc options only, and does not add or change any permissions). These determine:
-
View: whether the script builder can view the customer details in the Script Editor*
-
Edit: whether the script builder can edit existing scripts in the Script Editor*
-
Create Scripts: whether the script builder can create new scripts in the Script Editor*
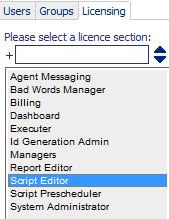
8. Ensure your script builder has been assigned a Script Editor licence:
9. Go the the Script Editor module, and double click on the Customer name to view the script list.
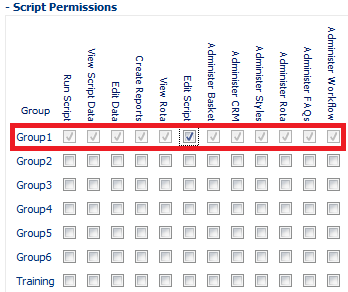
10. Click on the script name to view the script properties. Open up the Script Permissions options:
11. Tick the Edit Script option to add this script to the group. This will allow script builders to edit the script and it's associated features in the Script Editor.
12. Repeat as necessary for each script within that customer.
Ensure you test the user account to ensure it produces the expected result.
*Please note: if users associate a group with a customer that already has scripts, the permissions do not apply to the scripts that existed before the group did. However, if a group is created and then customers are associated with it, the permissions will apply. This means if scripts were set up before the group, a member of the System group will have to add permissions for the new group to each script in the Script Editor/Script Permissions.
Licensing
The licensing tab enables you to assign licences to individuals for the following functionality:
-
-
Bad Word Manager - access to the Bad Word Manager icon within the System Manager module.
-
-
Dashboard - the dashboard is a separately licenced module and is deprecated.
-
Executer (
Agent Desktop Licenses) All users have an Executor licence by default. Your CallScripter licence will control how many can be used concurrently, not how many you can create.
-
ID Generation Admin - access to the ID Gen Admin icon within the System Manager. Users can specify starting point for unique numbering criteria, and/or use this function to determine the path a script follows (for example, to create a "winner" based on the unique ID).
-
Managers - Manager licences provide supervisory access to the Call Manager and Management Information sections. Reports can be run and dropdown lists edited from the call manager.
-
Report Editor - The report module is a separately licenced module. Reports can be run by Managers, but can only be created and scheduled by holders of a report Editor licence.
-
Script Editor - The Script Editor module is a separately licenced module. Allows users to edit and build scripts and their associated functions.
-
-
System Administrator - Ordinarily, a single system administrator licence is purchased and a second is held but not charged for by CallScripter for support purposes. Further system administrator licences can be purchased.

