 User Guide |
|||||||
|
|||||||
|
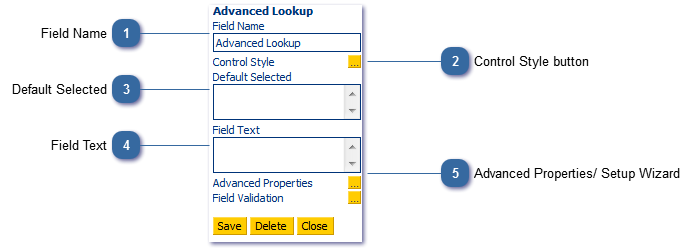
The Reference ID of each record selected by the agent (see 6 below) is stored in the Advanced Lookup field in the form "referenceID1, referenceID2, referenceID3...". If you wish to report on the agent selection, this is the data that will appear.
To return the result(s) of the advanced lookup to another page in the script, a Database Get control must be used to return the details of record selected.
Select * from [data source name ] where [unique data id column] = [Advanced Lookup Field Name]
|
|
Edit the style of the control. See Control Styling
|
Step 1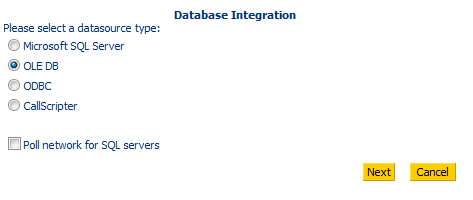 Choose the data source type to link to. In the example that follows, an Excel Spreadsheet connecting using OLEDB is used. Ideally the SQL table should be queried directly as many agents accessing the same spreadsheet can cause performance issues. The following steps will vary slightly depending on the data source type selected.
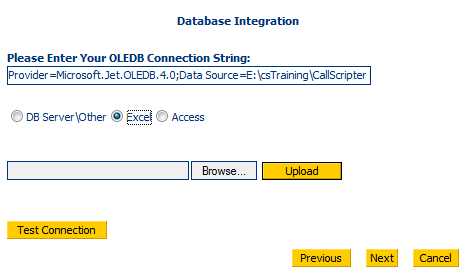
Step 2Create the link to the data source. In this example an Excel file is browsed and uploaded:
 SQL Server:
If connecting to a SQL server the server name is needed. Use Windows Authentication, or SQL Authentication with a username and password.
ODBC
If connecting to an ODBC data source, users will have either set up a system DSN or enter the ODBC Connection String for the data source.
Excel
If connecting to Excel, browse for the file and upload it. The connection string will be populated automatically.
CallScripter
If connecting to the CallScripter database itself, a username and password with the appropriate permissions to access the data is needed. If a default username and password has been configured for the system, it will be automatically entered and this section of the wizard will be skipped.
Step 3 Change the text identifier if required. Ordinarily this can be left as it is.
Step 4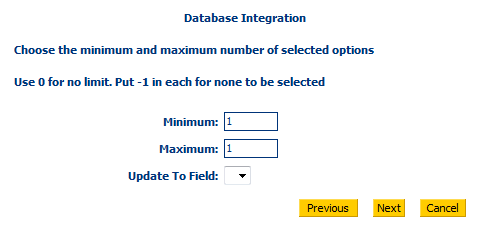 Specify the minimum and maximum number of records the agent can select. The Advanced Lookup Validation, with a button marked to "Validate Page" is required. See the section on Field Validation for further information.
Update To Field is used when nesting multiple Advanced Lookup controls. Create the first, create the second, return to the first, specify the field. Where you have specified a field to update to, use the FILTER value specified in step 5.
Step 5Enter the query to return the data as required:
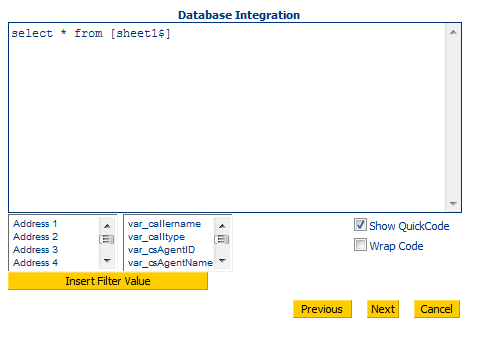 Any field or variable from the script can be filtered using a where clause. if nesting Lookups, to refer to the field specified in "Update to Field" in Step 4, click the Insert Filter Value button to add a placeholder which will swap out that value in the statement when it runs.
Step 6 There is no data to test. Click Next to continue
Step 7Choose Fields to Update.
Select "Display in list" to show the field in the in-script grid. Select a reference field that contains a unique value in the data.
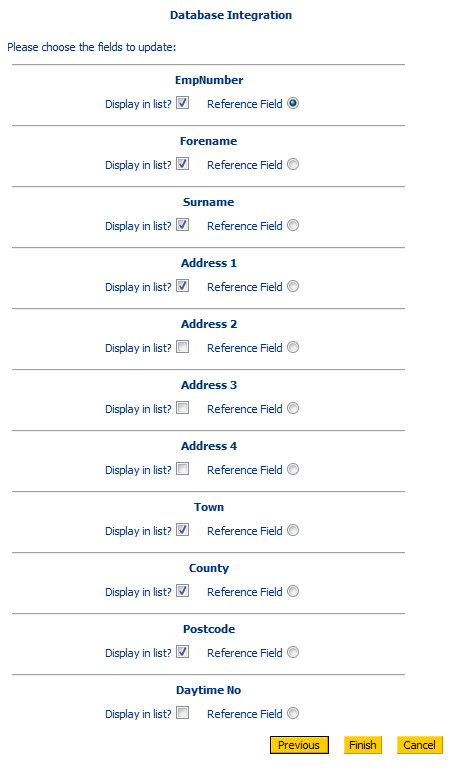 Click Finish at the bottom of the mapping window to complete the configuration of your Advanced Lookup control.
|