Creates a group of related checkboxes. Items in this list can be edited by a supervisor with access to the call manager where they can add to, edit and delete entries in list controls. See Tab: Manage Scripts.
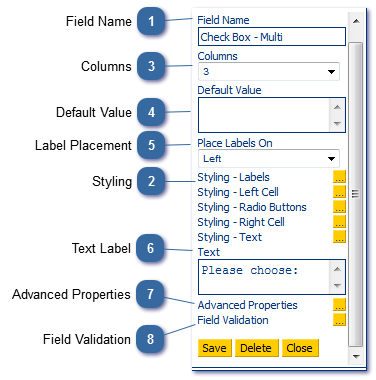
Field Name
Give your field an appropriate name. This is particularly important if using it in a calculation or report. Changing a field name will not automatically update corresponding reports that use that field.
The number of columns specified will denote the layout of your checkbox list. For example, if you have 9 checkboxes in your list, and you choose to display them in three columns, each row will have three checkboxes and you will have three rows. Conversely, if you choose to display the check boxes in one column, you will see nine rows.