Toolbar Label Add and Remove
Release History
|
Name
|
Change Description
|
Version Number
|
|
Toolbar Label Add Contol
|
New feature
|
Version 4.5.29
|
|
Toolbar Label Remove Control
|
New feature
|
Version 4.5.29
|
Toolbar Label - Add
Labels can also be set to appear in the Agents Toolbar (at the top and the bottom of the screen), and can either be static (for example "This is the Complaints Script") or variable (for example, to display the agent's name). The example below shows the script name, and the name of the agent running the script:

Code can either be used to carry out this function, or by simply using the Toolbar Label Add and Toolbar Label Remove controls.
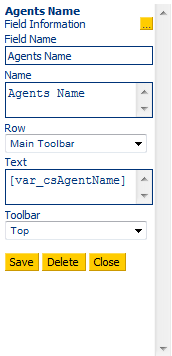
Name: reference point for the label, for example, if label needs to be removed later in script, this is the name to refer to
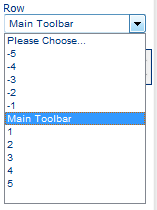
Row: Where the label should sit*
Text: the information to display, in the example above a variable is used to display the Agent's Username.
Rows
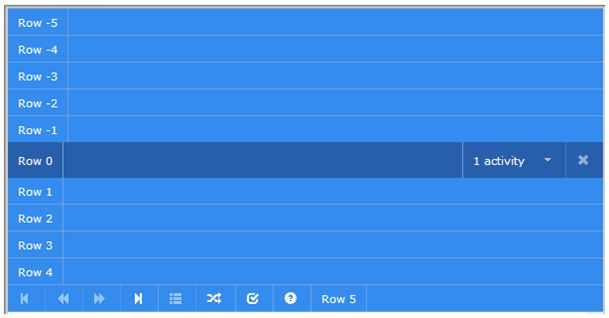
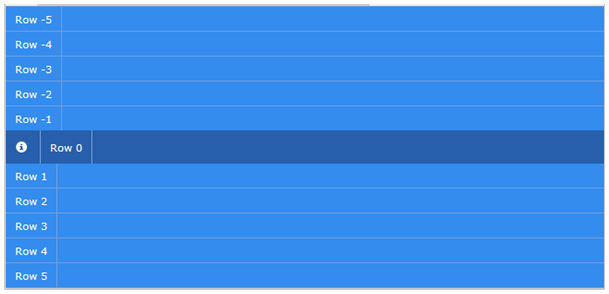
The user can determine where the label should sit, this function is particularly useful if many labels are used, and space becomes limited on the toolbar.
Example of Row Positioning: Top Toolbar
Example of Row Positioning: Bottom Toolbar
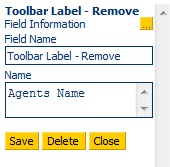
Toolbar Label - Remove
The Toolbar Label - Remove control will remove any labels on the agent toolbar. This feature is particularly useful when the information displayed in a label is no longer relevant to an agent (for example, warnings).
When positioned on a script page this control will remove any labels based on the Name field in the control. In the example below, the Agents Name label is removed:
Note: if required, code can be used instead:
Script.Labels.Add (text, toolbar, row, name);
Text: the text to display in a label, wrapped in quote marks. Variables must be wrapped in square brackets
Toolbar: which toolbar to add to – either "top" or "bottom"
Row: Which row number to use (see notes below)
Name: unique name (should it need to be removed), wrapped in quote marks
For example:
