Legacy Feature - Multi Level Pick list Admin
|
Name
|
Change Description
|
Version Number
|
|
Modification
|
Feature available on request only
|
Version 4.5.36+
|
The Multi Level Pick list Admin section allows you to view and administer the multi level pick list controls within scripts, and the values they contain.
Pick lists can be associated either with an individual customer, or as a generic pick list that you'll use over and over, for all customers.
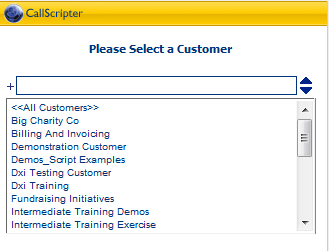
To start, click on the 'Multi Level Pick list Admin' icon within the 'Script Editor'. You will be presented with a page that will allow you to select the customer the pick list is to be created for, or create a pick list for <<All Customers>>:
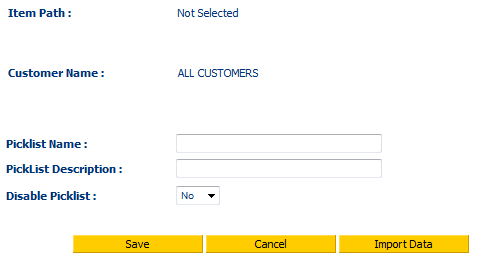
Double click an individual customer, or <<All Customers>> as required. if you have already created a pick list for the selected customer, or all customers, it will be displayed in a list for editing, otherwise click Add New Pick list and complete the name and description of the pick list:
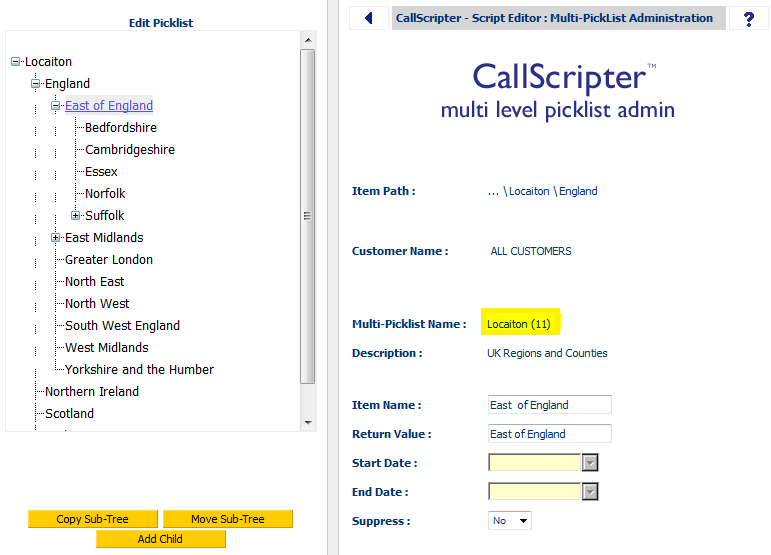
Once saved, the picklist will appear in the list for the currently selected customer, or ALL CUSTOMERS. Double click the pick list name to add entries and subentries.
Once you have added the first item to the list, you can then add Child items to form sub-lists. Before clicking the Add Child button, you must select the Parent item that you want the child item belong to.
-
Item Name = Text the agent sees within the script.
-
Return Value = Value that is returned to the database.
-
Start Date and End Date = (optional) the list item will only be visible between the dates selected.
-
Suppress = Yes/No drop down list to choose whether to show entry or not.
After each entry, click 'Save'.
Once you have saved your first entry, an ID number will appear next to the Multi-Picklist Name. You will need this number (Multi-level pick list ID) to reference your pick list from the
Multi-Level Picklist control in your script.
You can copy and move each sub-tree or list using the buttons provided. Select the item to copy/move, click the appropriate button, then select the item that represents the new parent for the sub-tree.